Sections
Canvases are the centermost piece of creating a JavaScript game on a website. It’s where everything in the game can be viewed and interacted with. The end goal for our canvas should meet the following critera:
- Creating and Resizing a Canvas (adjusting a canvas to the size of a screen)
- Drawing Elements - (Drawing objects onto the canvas)
- Animating Elements - (Moving things around)
- Interacting with Elements - (Mouse, key touches, phone controls, etc.)
We’ll go through each step through this blog.
A breakdown of each these steps can be on found on this video, made by myself, go through each part and making a canvas along the way.
Creating and Resizing a Canvas
Creating a canvas is quite simple. All one must do is create an html element formatted as <canvas id="canvas"></canvas>. Doing only this in a html file would seemingly do nothing, and if you check the page there is nothing. However, in reality, something HAS been created. Inspecting, the code, you’ll see a blank canvas & its dimensions.
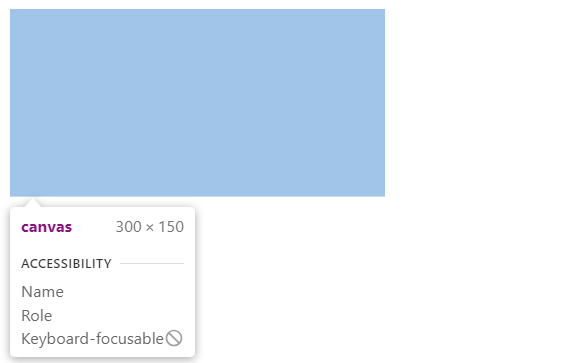
Nothing can really be done with canvas though. It has to been seen by the user to be used. With some basic styling with CSS, we can give the canvas a border. canvas { border: 1px solid black; } The canvas should look something like this:

So now we have the first part of this section done with. Creating a canvas. Now we have to figure out how to resize the canvas. We can’t have the width and height static, they have to dynamically change based off the size of the screen. To do this, we have to begin utilizing JavaScript, which is where most, if not all of the configurations of our canvas will be made.
The first step in doing this would be defining what the canvas is in the script JavaScript part of the code. Once we do that, we can call upon that variable and use it to edit the height and of the canvas. To make it so it changes dynamically based off the size of the screen, we can use the code window.innerWidth & window.innerHeight.
const canvas = document.getElementById('canvas');
canvas.width = window.innerWidth;
canvas.height = window.innerHeight;
This is what the code would like in action. Let’s break down each line.
- The first line defines the canvas in the HTML part of the code. It does this by matching the id of canvas given to the
<canvas>tag. - The second line makes it so the width of the canvas is the width of the window/screen vieweing the page.
- The third line does exactly what the second line does, except it’s for height.
So at this point, we have code to define the Canvas in HTML, styling for the canvas border, and basic JavaScript to initially resize the canvas depending on the window size. The code currently should look something like the following:
<html>
  <head>
    <title>Canvas Resize</title>
  </head>

  <style>
      canvas {
        border: 1px solid black;
      }
  </style>

  <body>
    <canvas id="canvas"></canvas>
    <script>
      const canvas = document.getElementById('canvas');
      canvas.width = window.innerWidth;
      canvas.height = window.innerHeight;
    </script>
  </body>
</html>
With less than 20 lines of codes, we have successfully created a border with basic logic for resizing. However, in reality, it isn’t that simple. The border is initially set to the correct size, but when moved to another window, for example, a bigger monitor, the canvas gets distorted and stays and its original size. It’ll look pretty similar to the bordered canvas above with no logic to resize its dimensions.
Alas, there is quite a simple fix to this issue. All we have to do is encapsulate the code we have for resizing the canvas in a function, then call that function whenever the window changes size.
<html>
  <head>
    <title>Canvas Resize</title>
  </head>

  <style>
      canvas {
        border: 1px solid black;
      }
  </style>

  <body>
    <canvas id="canvas"></canvas>
    <script>
      const canvas = document.getElementById('canvas');

      //Function to resize canvas
      function resizeCanvas() {
        canvas.width = window.innerWidth;
        canvas.height = window.innerHeight;
      }

      //Initial canvas setup
      resizeCanvas();

      // Add a resize event listener
      window.addEventListener('resize', resizeCanvas);
    </script>
  </body>
</html>
This is how the code will currently look implementing this. Not much as changed. There is now a function that resizes the Canvas, using our original method. We have a line of code to initially resize the canvas, and we have a new, novel line of code called an event listener that makes sure everytime the window is resized, the resizeCanvas function is ran again. Now anytime the window changes size, the event listener detects that change and runs the function to resize the window accordingly.
And there you have it. A fully functional method of creating and resizing a canvas. The next section will go over how to draw animations within the canvas.
Bonus - Organizing Code
Before we go into our next section of drawing animations, let’s take a step back to organize our code. You can see that our code above can get a little bit messy with the CSS, HTML, and JavaScript all in one place, and it’ll only get worse as we add more stuff. This is why, from now, we’ll split our code it three groups.
- main.html
- styles.css
- canvas.js
Considering how most of what we’ll code will be in JavaScript, this’ll make it easier in vieweing & editing our JavaScript code. The only main change we’ll have to make, besides separating the code, is linking the css and js files to the html one so they all connect together.
<!DOCTYPE html>
<html lang="en">
  <head>
    <meta charset="UTF-8">
    <meta name="viewport" content="width=device-width, initial-scale=1.0">
    <link rel="stylesheet" type="text/css" href="styles.css" />
    <title>Canvas</title>
  </head>
  <body>
    <canvas id="canvas"></canvas>
    <script src="canvas.js"></script>
  </body>
</html>
This is what the HTML file should look like. You’ll see that not only did we link both the script and css files, but also added some additional things, such as charset and viewport. It’s good practice to add these things to any HTML file. Their exact purpose is for you to learn on your own. The CSS & JavaScript will also be shown, so you can how much easier things are to see.
canvas {
  border: 1px solid black;
}
const canvas = document.getElementById('canvas');

//Function to resize canvas
function resizeCanvas() {
  canvas.width = window.innerWidth;
  canvas.height = window.innerHeight;
}

//Initial canvas setup
resizeCanvas();

// Add a resize event listener
window.addEventListener('resize', resizeCanvas);
So now that we have adjusted our code to be much more organized than before, let’s get into the next section of drawing animations.
Drawing Animations
For this section, all that matters is the JavaScript section of our code. The first and most important step for creating animations, drawings, etc. is adding the line const context = canvas.getContext('2d'). This line of code allows te rendering of animations, drawing, text, images, etc. on the Canvas. Without this, drawing stuff on the image would be impossible. This line should be right after the canvas is defined.