Deployment
Intro
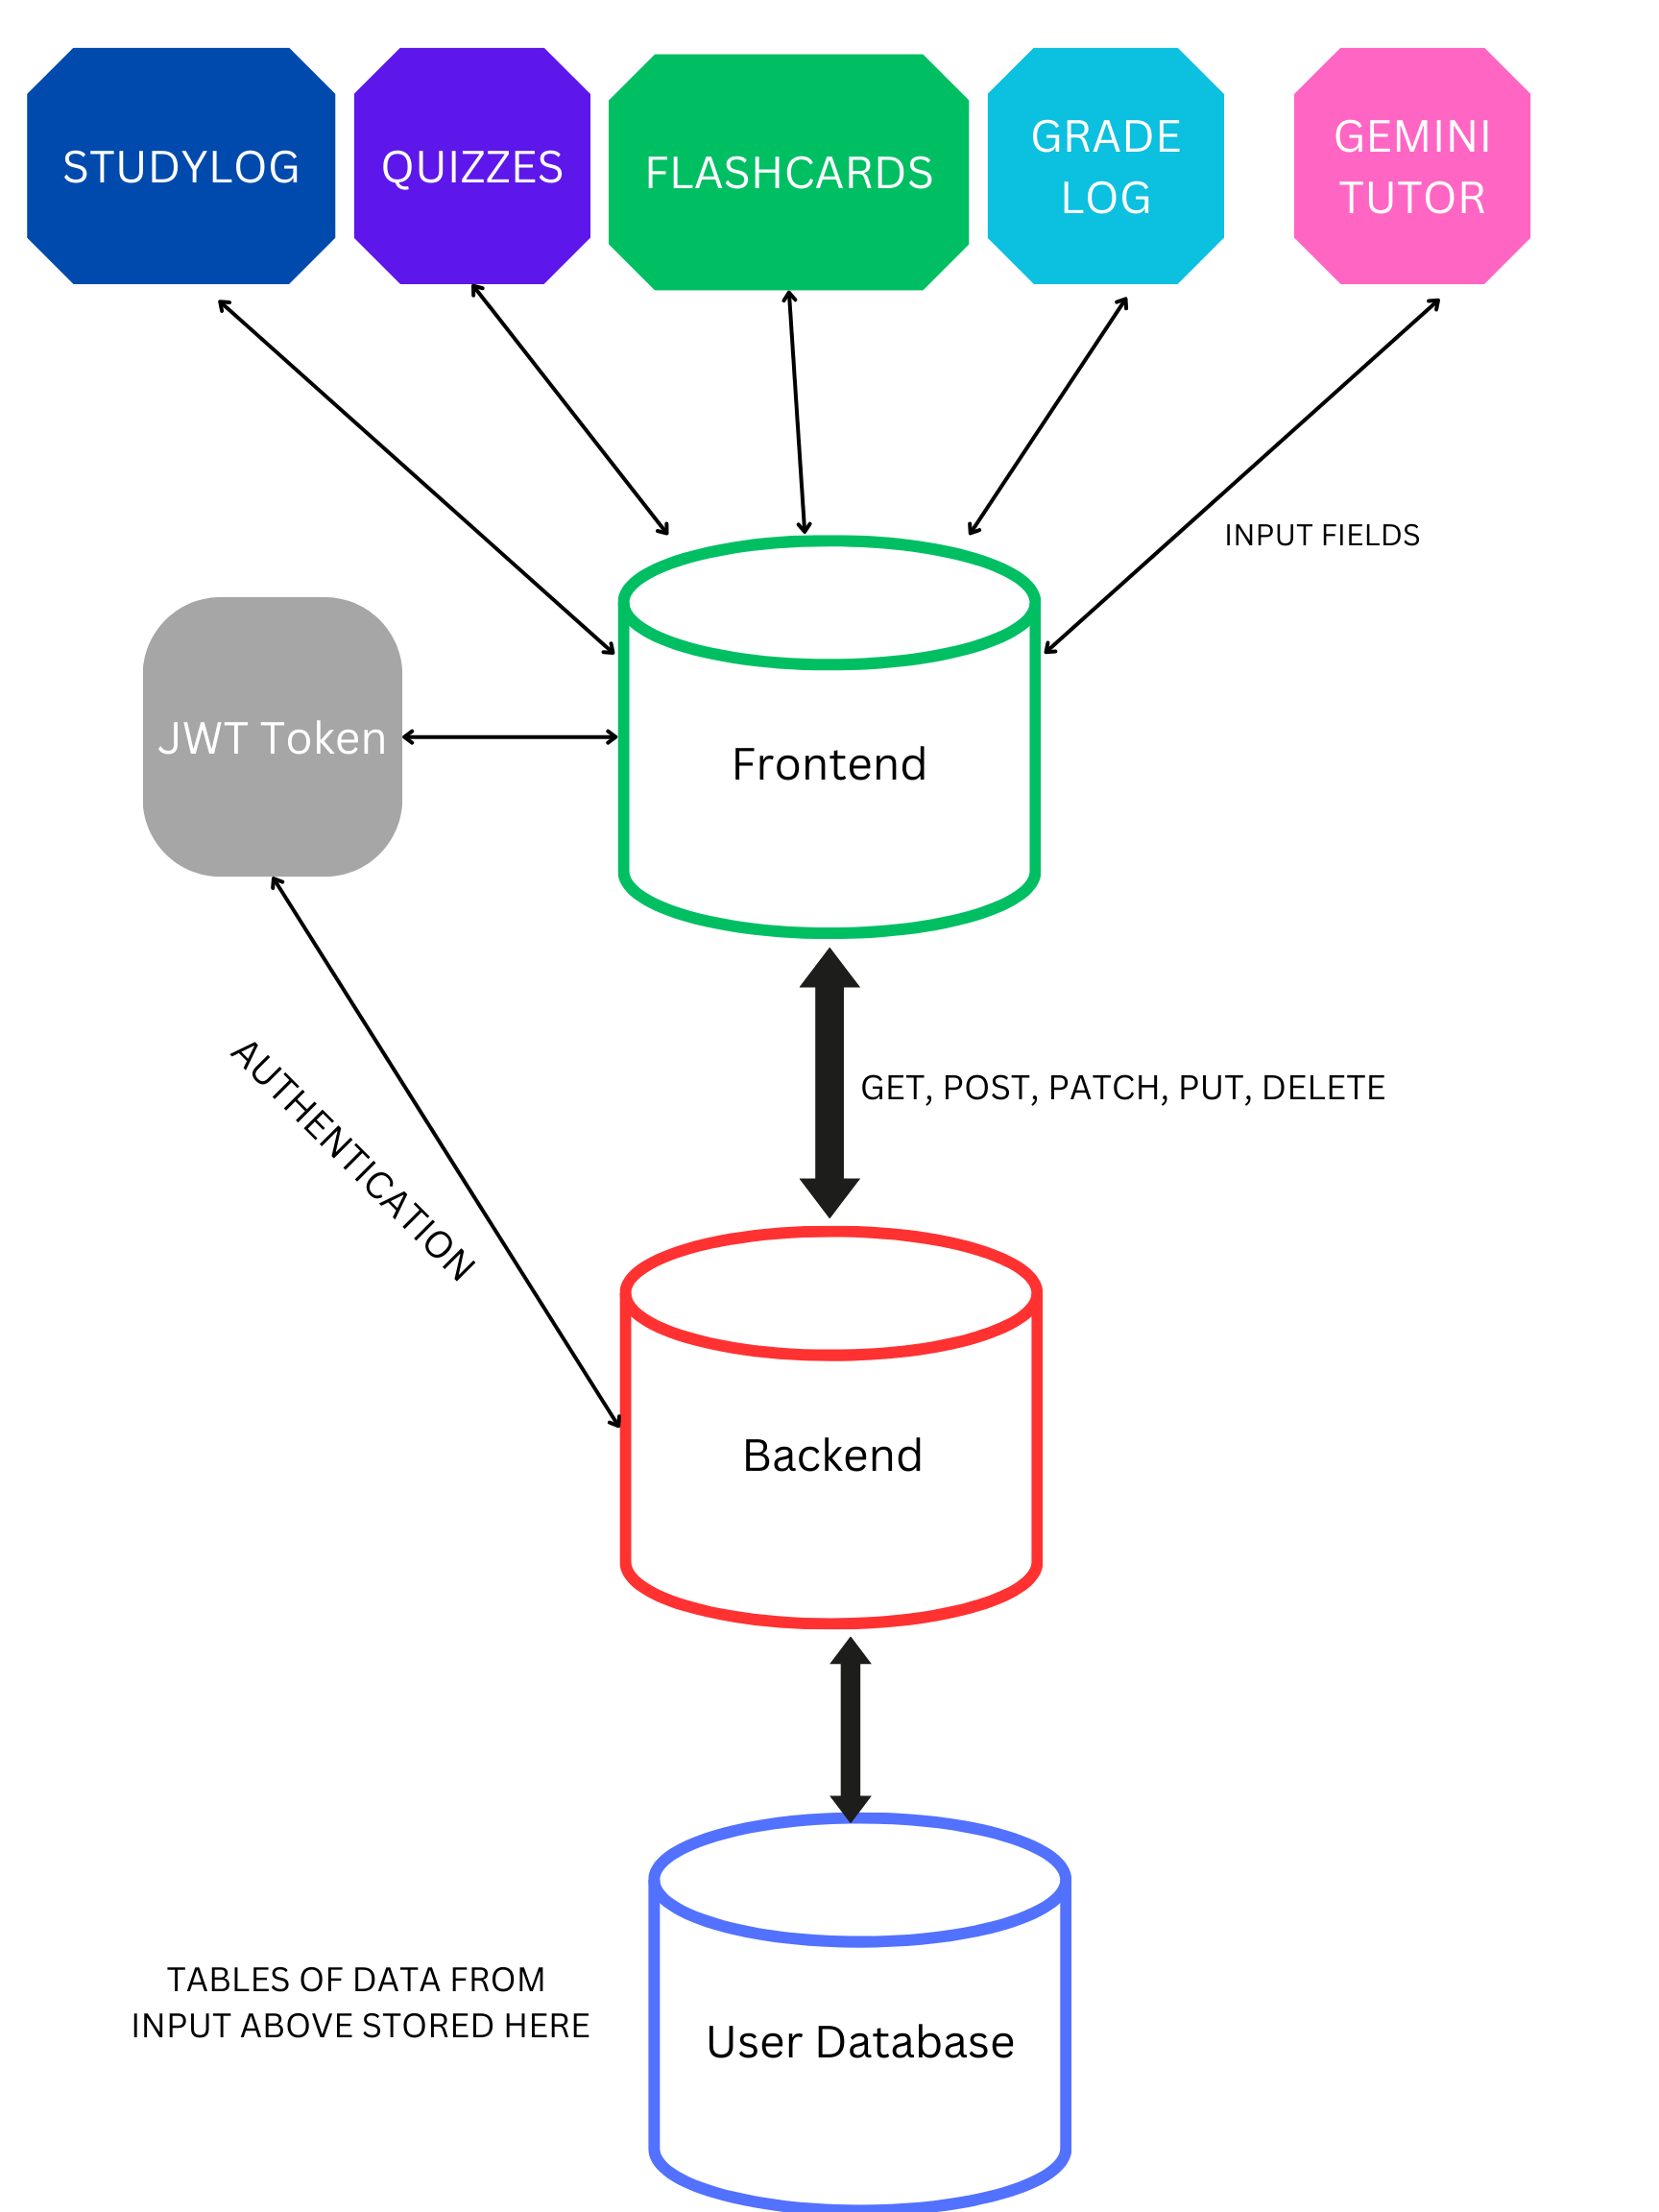
What time is it? Time for deployment! This blog will serve as reference on how we plan to setup and proceed with the deployment of Cantella.
Pre-Deployment Process
(1) Verify Function of Frontend & Backend
Before deploying, all features should work! If it doesn’t work locally, it won’t work on AWS.
(2) Create a Burndown List
The checklist includes tasks to do before, during, and after deployment and additionally team roles.
(3) Prepare Config Files
We selected the port 8202 and updated our config files accordingly
Frontend Files
- config.yml
Server: https://cantella.nighthawkcodingsociety.com/ Domain: nighthawkcodingsociety.com Subdomain: cantella - assets/js/api/config.js
export var pythonURI;
if (location.hostname === "localhost") {
      pythonURI = "http://localhost:8202";
} else if (location.hostname === "127.0.0.1") {
      pythonURI = "http://127.0.0.1:8202";
} else {
      pythonURI =  "https://cantella.stu.nighthawkcodingsociety.com";
}
Backend Files
- main.py
# this runs the flask application on the development server if __name__ == "__main__": # change name for testing app.run(debug=True, host="0.0.0.0", port="8202") - Dockerfile
FROM docker.io/python:3.11 WORKDIR / # --- [Install python and pip] --- RUN apt-get update && apt-get upgrade -y && \ apt-get install -y python3 python3-pip git COPY . / RUN pip install --no-cache-dir -r requirements.txt RUN pip install gunicorn ENV GUNICORN_CMD_ARGS="--workers=1 --bind=0.0.0.0:8202" EXPOSE 8202 # Define environment variable ENV FLASK_ENV=production CMD [ "gunicorn", "main:app" ] - docker-compose.yml
version: '3' services: web: image: cantella build: . env_file: - .env ports: - "8202:8202" volumes: - ./instance:/instance restart: unless-stopped - nginx_file
server { listen 80; listen [::]:80; server_name cantella.stu.nighthawkcodingsociety.com ; # Change server name to the one on R53 # Configure CORS Headers location / { proxy_pass http://localhost:8202; # Change port to port on docker # Simple requests if ($request_method ~* "(GET|POST|PUT|DELETE)") { # Customize Request methods based on your needs add_header "Access-Control-Allow-Origin" *; } # Preflighted requests if ($request_method = OPTIONS ) { add_header "Access-Control-Allow-Credentials" "true" always; add_header "Access-Control-Allow-Origin" "https://xaviertho.github.io" always; add_header "Access-Control-Allow-Methods" "GET, POST, PUT, DELETE, OPTIONS, HEAD"; # Make sure the request methods above match here add_header "Access-Control-Allow-Headers" "Authorization, Origin, X-Requested-With, Content-Type, Accept"; return 200; } } } - _init__.py
# Allowed servers for cross-origin resource sharing (CORS), these are GitHub Pages and localhost for GitHub Pages testing
cors = CORS(app, supports_credentials=True, origins=['http://localhost:8202', 'http://127.0.0.1:8202', 'https://xaviertho.github.io'])
Deployment Process
(1) Create a DNS Record
To create a DNS record, you first have to log into AWS
These are the account details:
Account ID: nighthawkcodingsociety
IAM username: ubuntu
Password: REDACTED
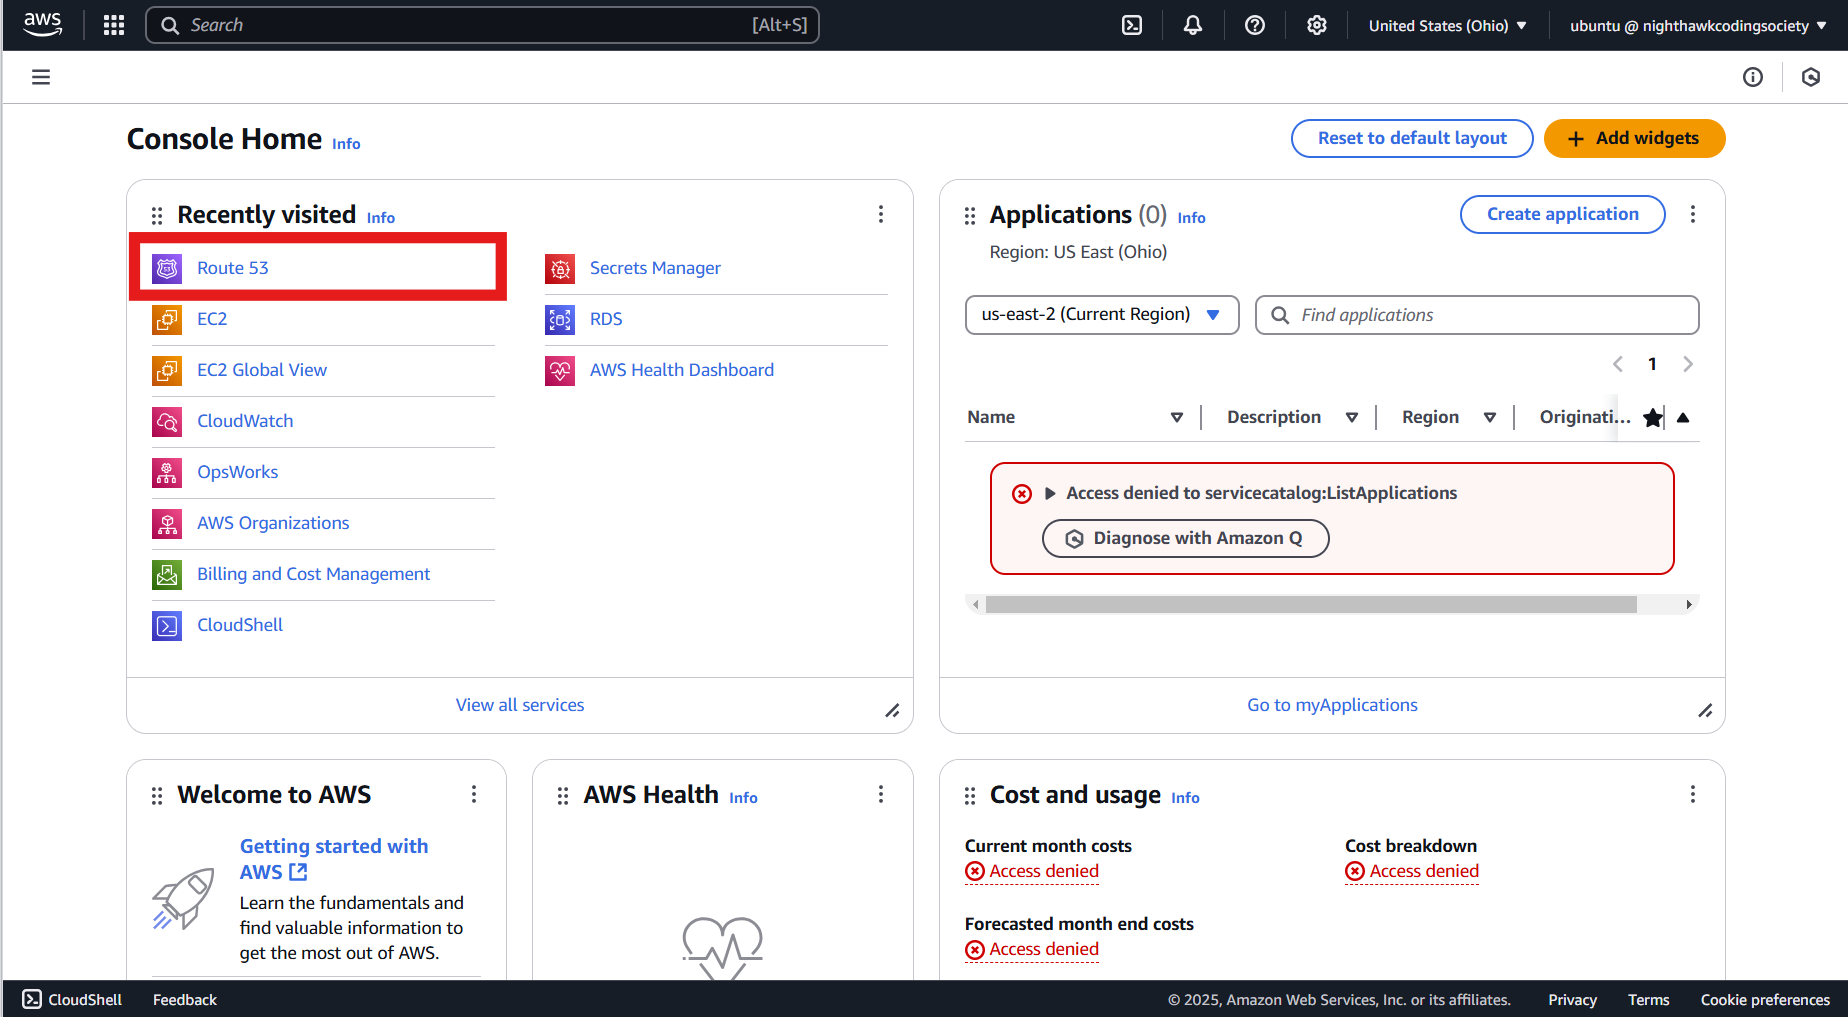
Once signed in, you should click the button on the home page titled Route 53
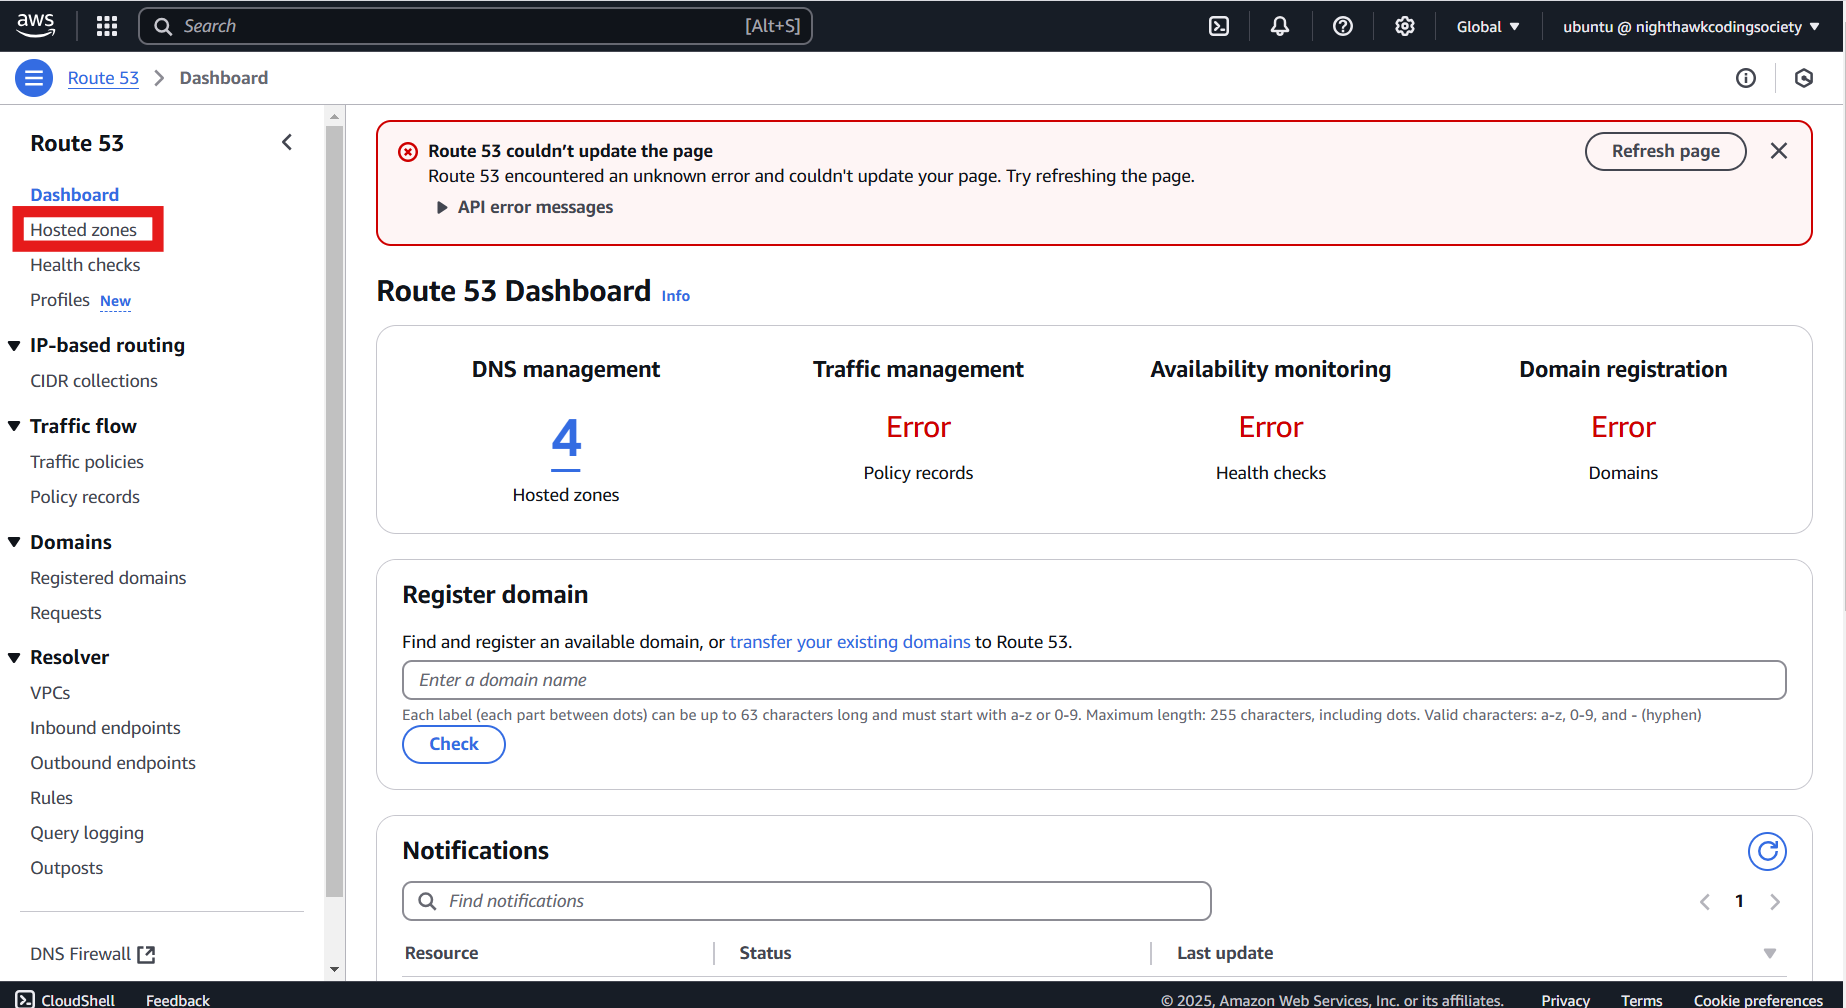
The next step (when on the Route 53 page) is to press the Hosted zones section on the column to the left.
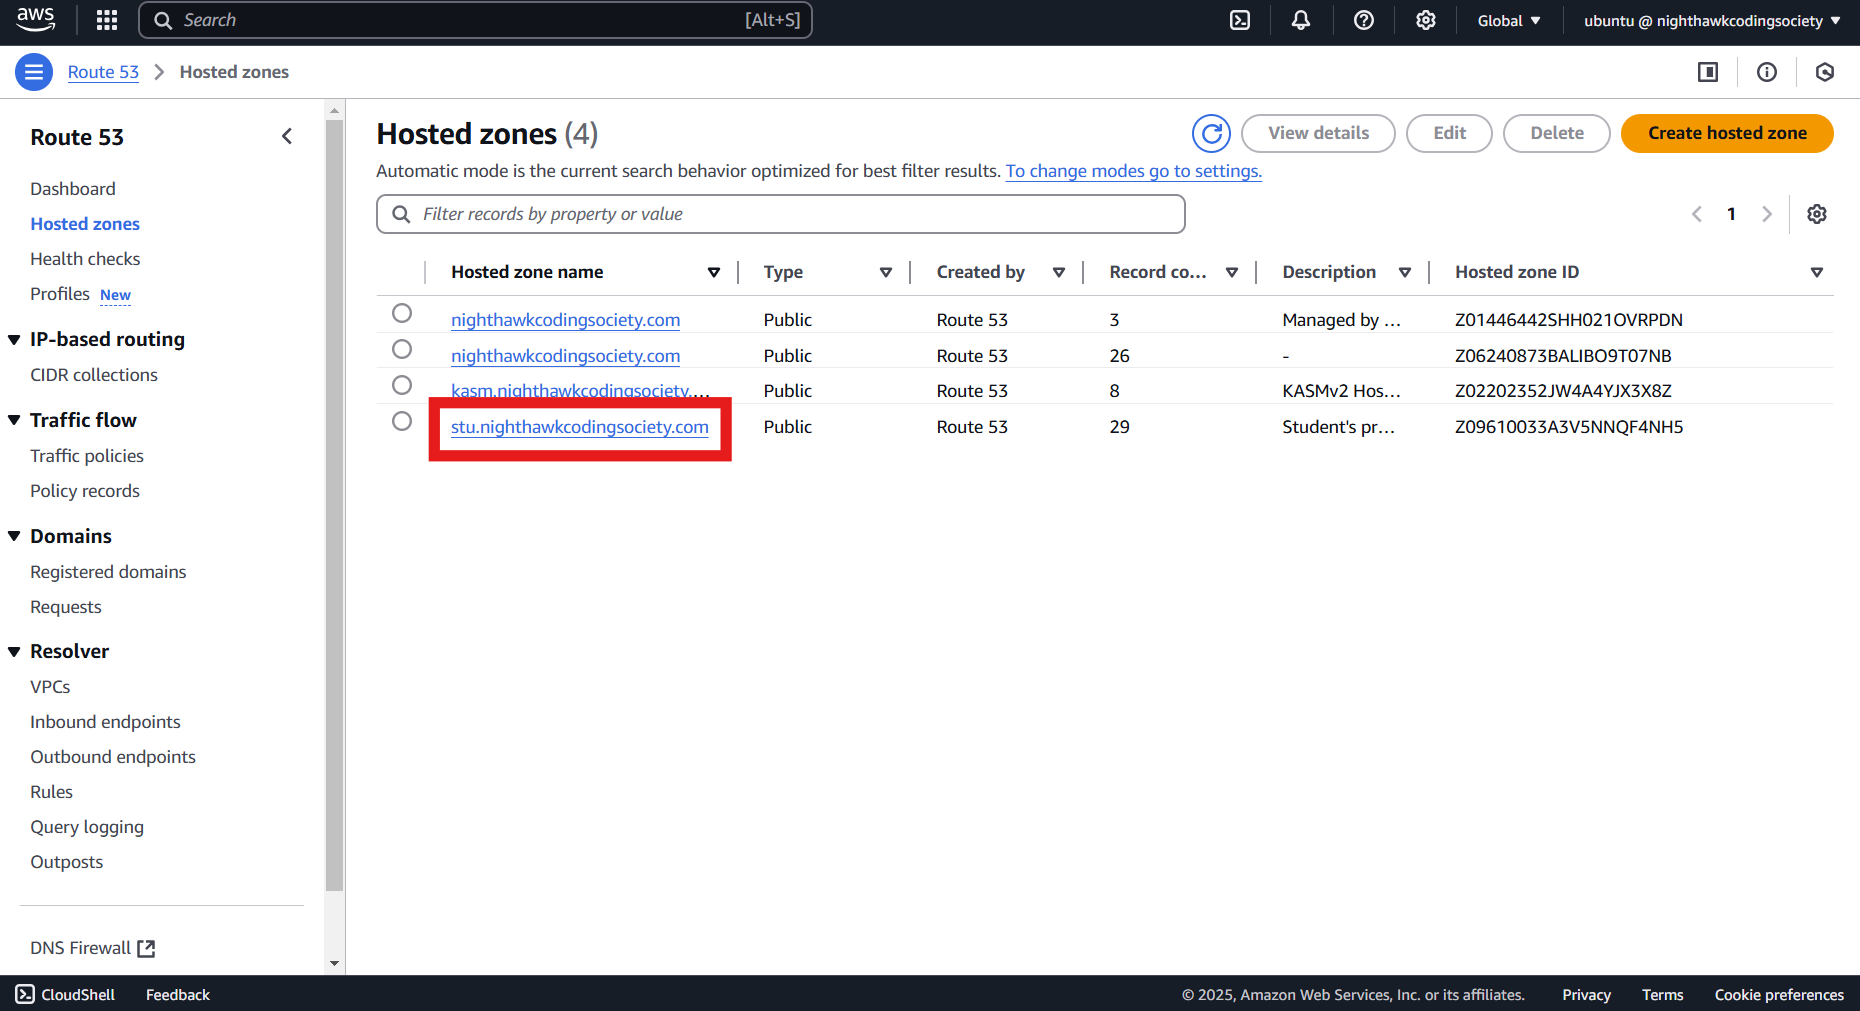
Here, click on the hosted zone called stu.nighthawkcodingsociety.com
We have made it to the page where we can create a DNS record. Click the button that says Create record
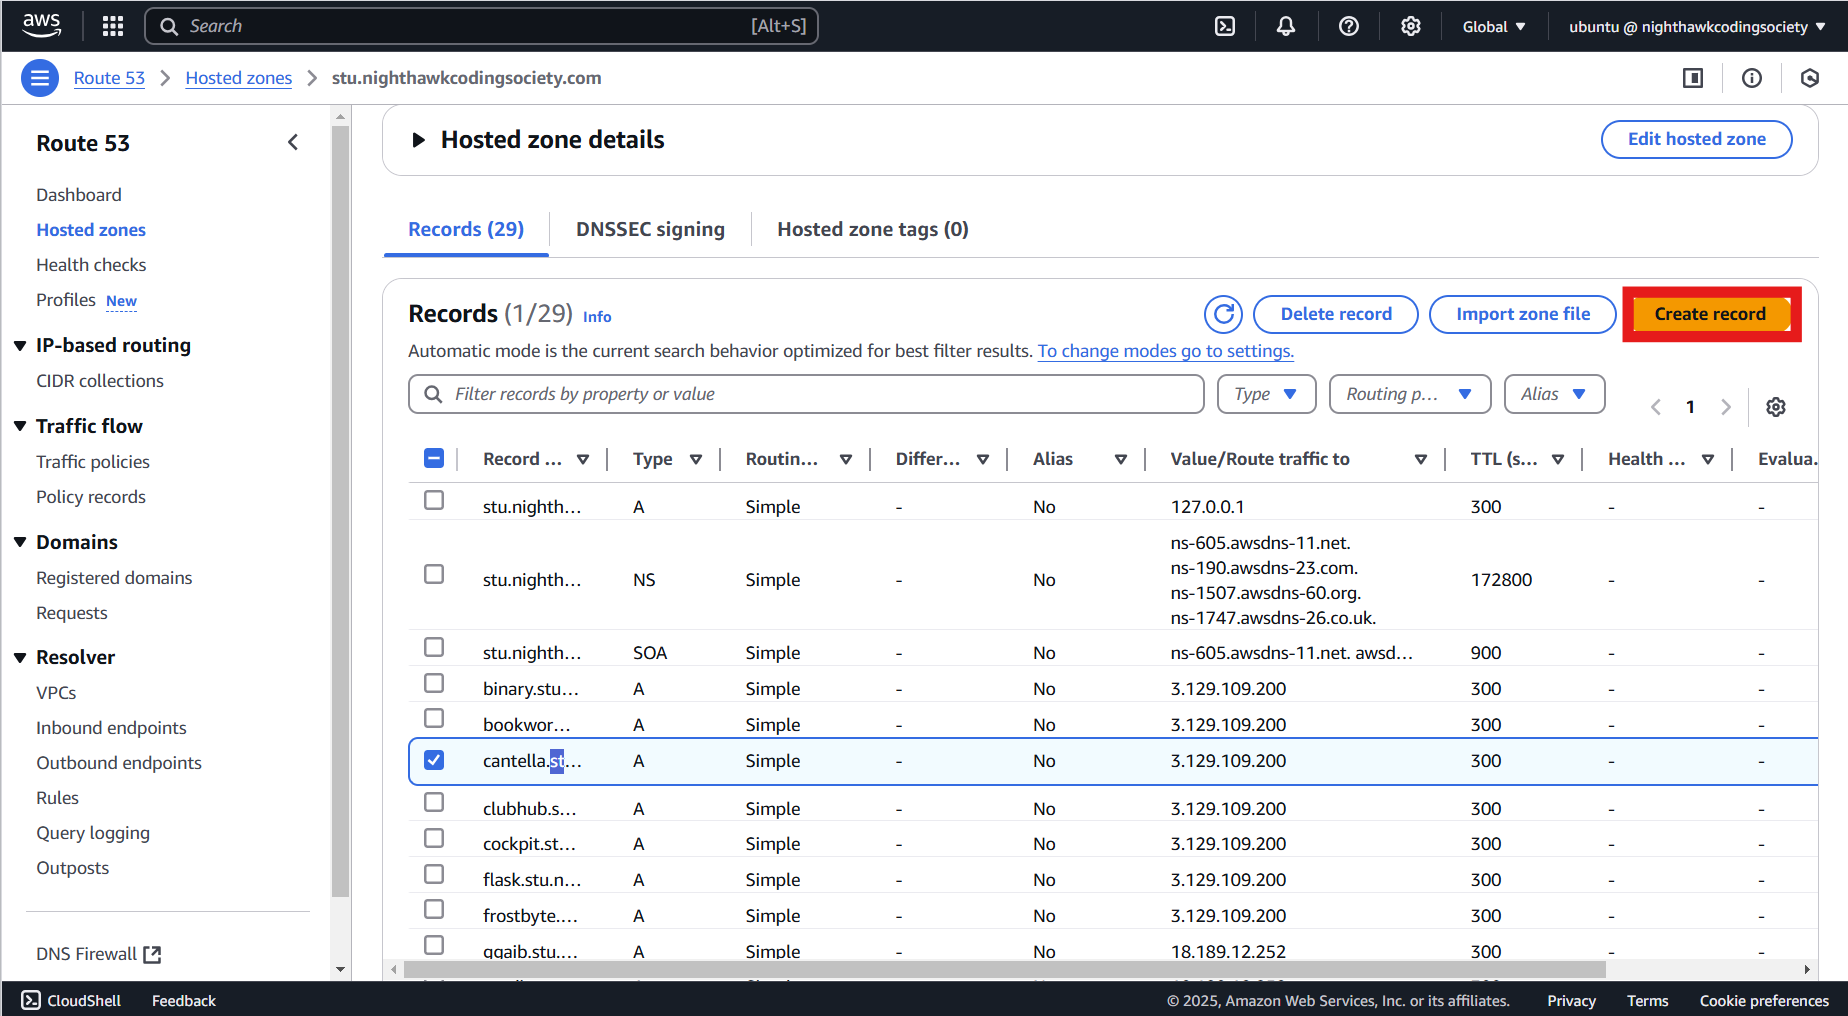
When creating a record you need to put in some information. Here is the following information that should be inputted:
Record name: name of your project (ex: cantella)
Record type: A - Routes traffic to an IPv4 address and some AWS resources
Value: 3.129.109.200
TTL (seconds): 300
Routing policy: Simple routing
Here is this info being inputted on the actual site:

Once all categories have been filled, click the Create record button on the bottom right.
If successful, you should receive a notification that a new record was successfully created
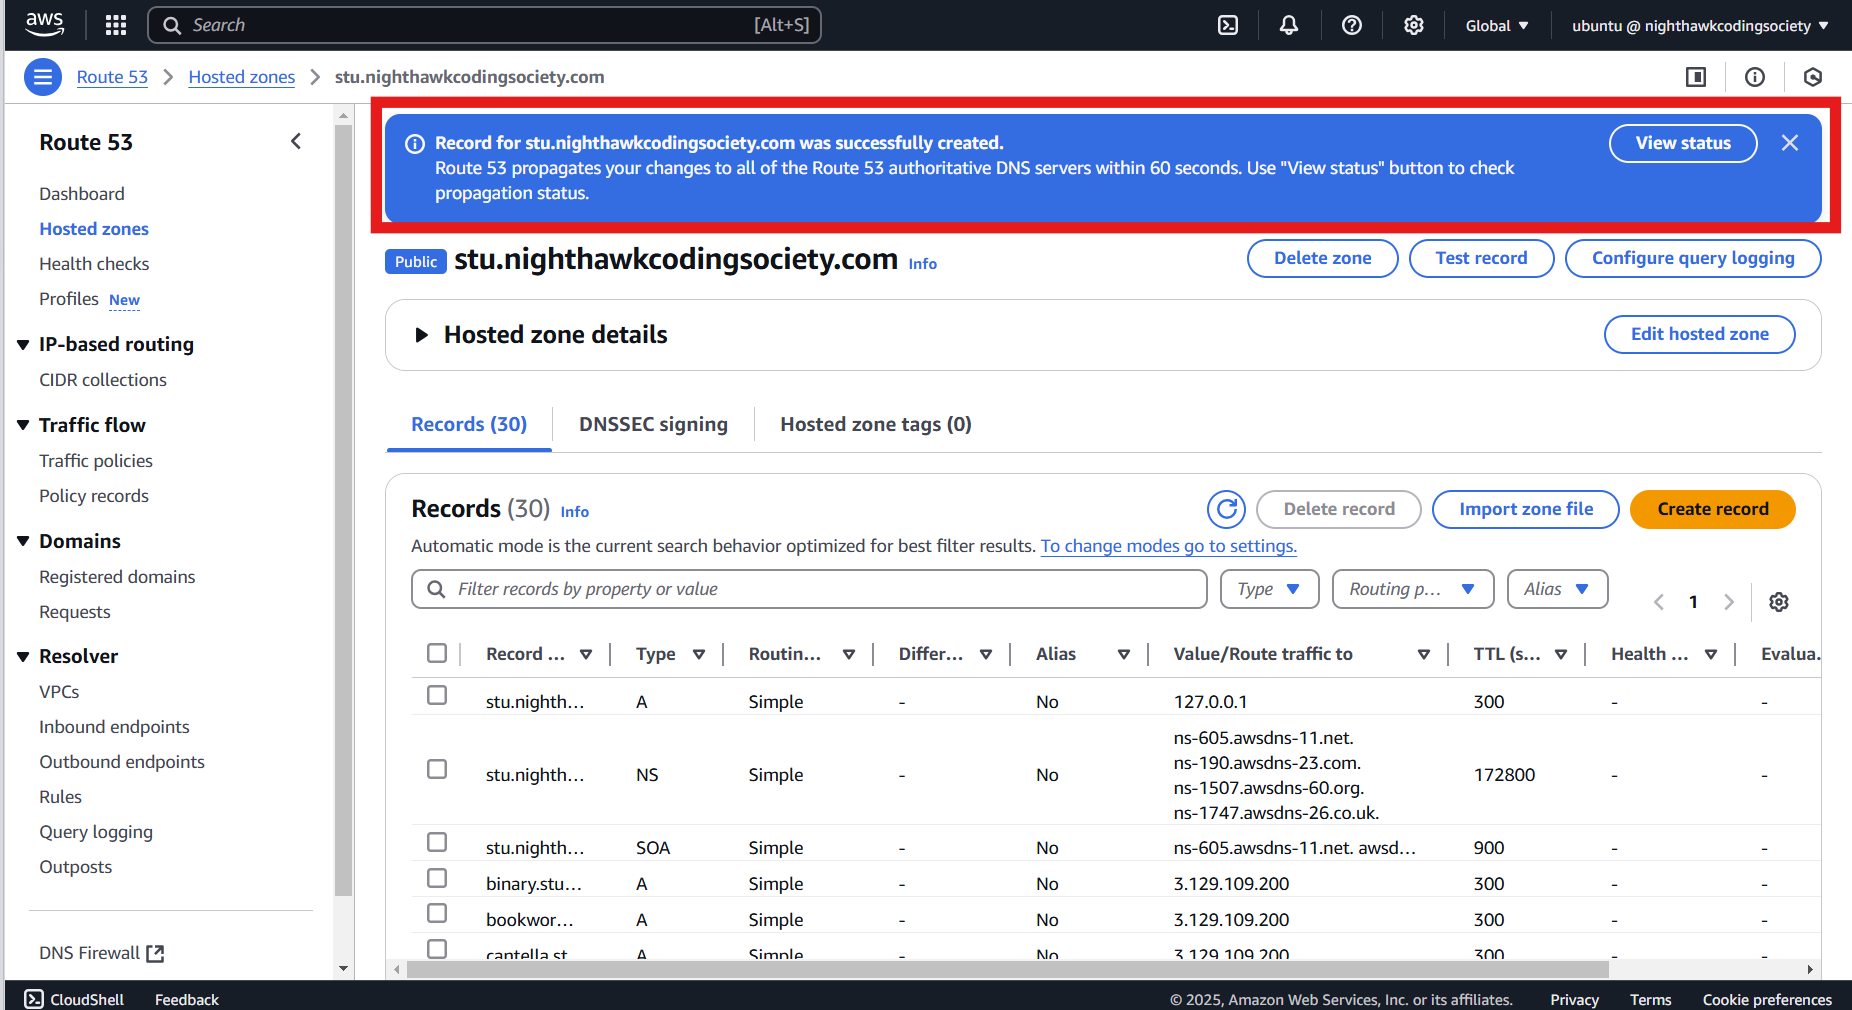
At this point, you have successfully created a DNS record (which we will use later on).
(2) AWS Setup
First, login into the AWS Terminal
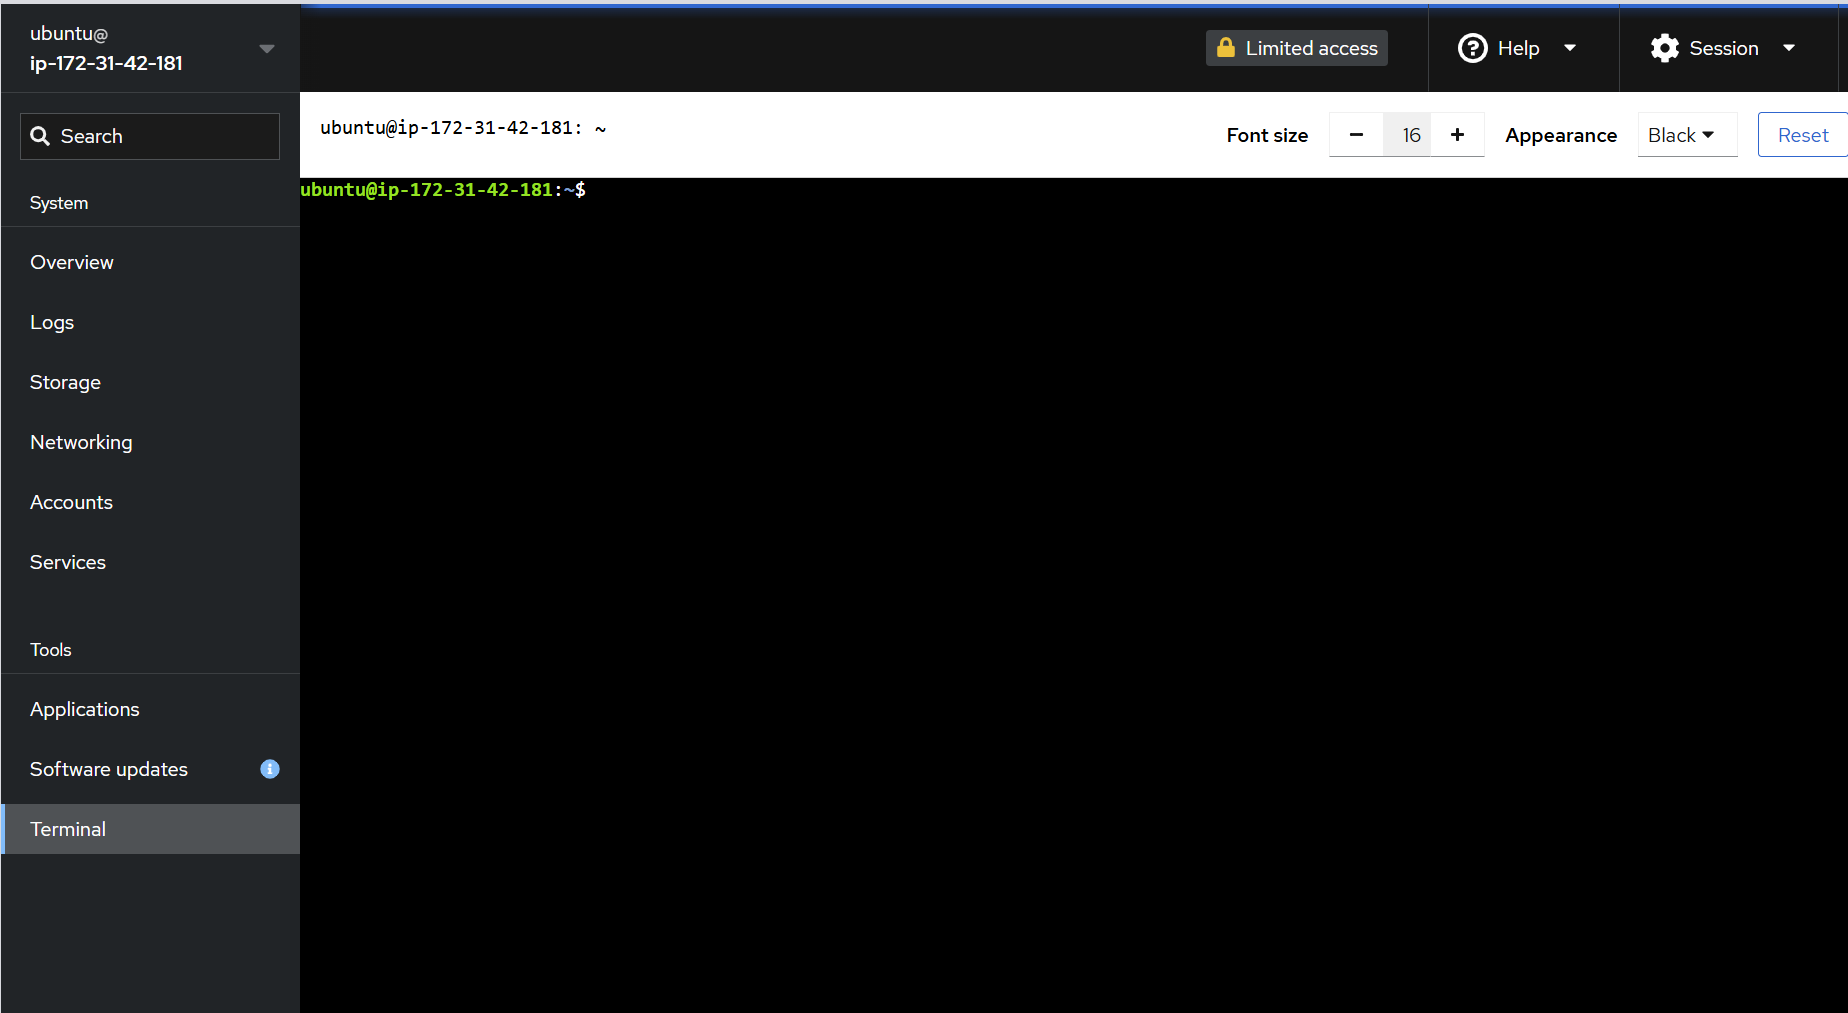
Now run the following commands:
- Change into the correct directory: `cd ~`
- Clone your backend repo: `git clone https://github.com/[username]/[repo_name].git`
- Navigate into your repo: `cd repo_name`
- Create an .env file: `nano .env`
- The .env file should have the following info:
# User Defaults
ADMIN_USER='tob./scry'
ADMIN_PASSWORD='123Toby!'
DEFAULT_USER='hop'
DEFAULT_PASSWORD='123Hop!'
- Build the site: `docker-compose up -d --build`
Docker-compose up -d –build does one of two things

- Test your site: curl localhost:8--- (replace '8---' with your port number)
- For curl, if you see the content of one of your backend files, you know you succeeded
(3) Nginx Setup
- Change into the correct directory:
cd ~ - Navigate into your repo:
cd repo_name - Copy paste your nginx file into /etc/nginx/sites-available:
sudo cp [nginx_file] /etc/nginx/sites-available/. - Change back into ~ directory:
cd ~ - Navigate to sites-enabled:
cd /etc/nginx/sites-enabled - Create a symbolic link (shortcut) to the nginx file in sites-available:
sudo ln -s ../sites-available/[nginx_file] - Test to see if there is any syntax errors:
sudo nginx -t - Restart nginx:
sudo systemctl restart nginx - Test domain name on a browser (http:// only)
(4) Certbot Config
Certbot provides your site a certificate to go from HTTP to HTTPS
- Run
sudo certbot --nginx
This should be the output:

Once on this screen, enter the number corresponding to your subdomain. In the case of my own website, cantella, I would pick the number 2 based off the image above.
Assuming, you did all the steps before correctly, you will be met with output that includes Successfully deployed certificate for [subdomain].stu.nighthawkcodingsociety.com
Post-Deployment Process
Updating Repo in the AWS Terminal
When you edit and commit changes on VSCode, they don’t automatically get changed on AWS. The following steps show how this can be done.
- Navigate to the initial directory:
cd ~ - Navigate into your repo’s directory:
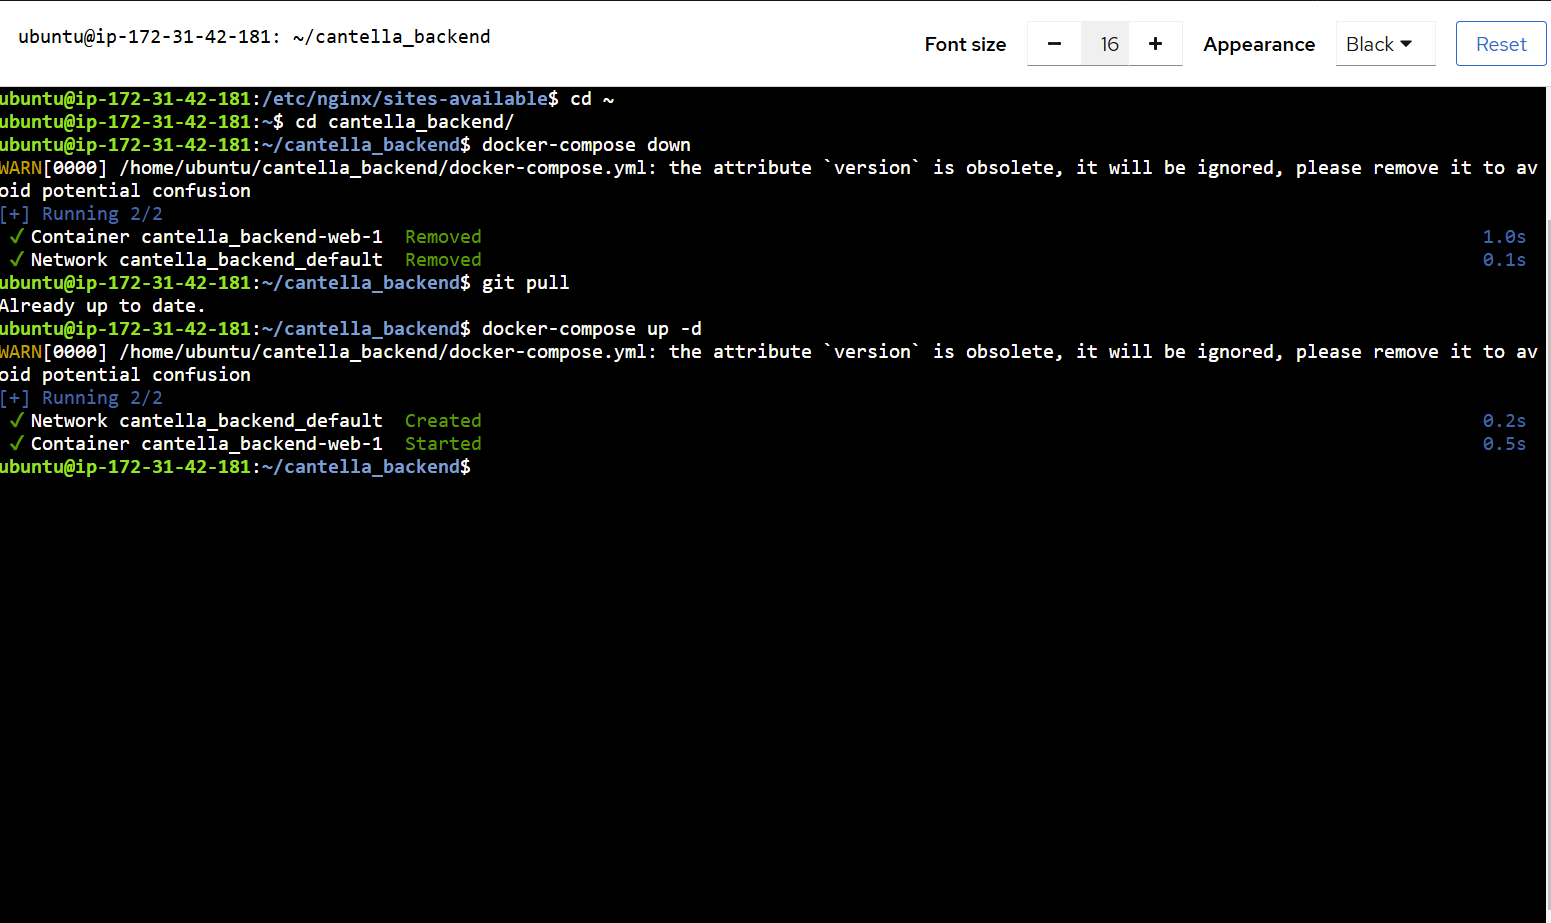
cd repo_name - Shutdown the subdomain:
docker-compose down - Pull in any changes:
git pull - Reinitialize the subdomain:
docker-compose up -d
Below, you can see me implementing these steps accordingly.
Update Index Page
Once, you get your subdomain fully setup, you can access the link online.
Here is our link for reference
However, initially, all our pages will look like this by default.
In order to change this (and you should), you need to access the file on your backend.
The relative path to the file is: templates/index.html
Here, you can begin changing the site to your heart’s content.