Hitbox Plan
To more accurately represent our player’s hitbox, we are experimenting with hitbox overlays, which is just another way of saying that we’re putting another hitbox over our player that will actually be used for collisions.
To do this, we are using previously made code, where we made a square that can move, jump, etc. The idea is that this square will be invisible and follow the exact movements of the player so it can be used as a hitbox.
Brainstorming
As we further investigated how hitboxes work, we realize, even for the best of games, hitboxes aren’t perfect. Sometimes, they’re not even close to perfect. One such example of this is a famous game called Geometry Dash. In a nutshell, you must avoid obstacles and spikes to win. However, the hitboxes can sometimes be… quite inaccurate to the actual shape.
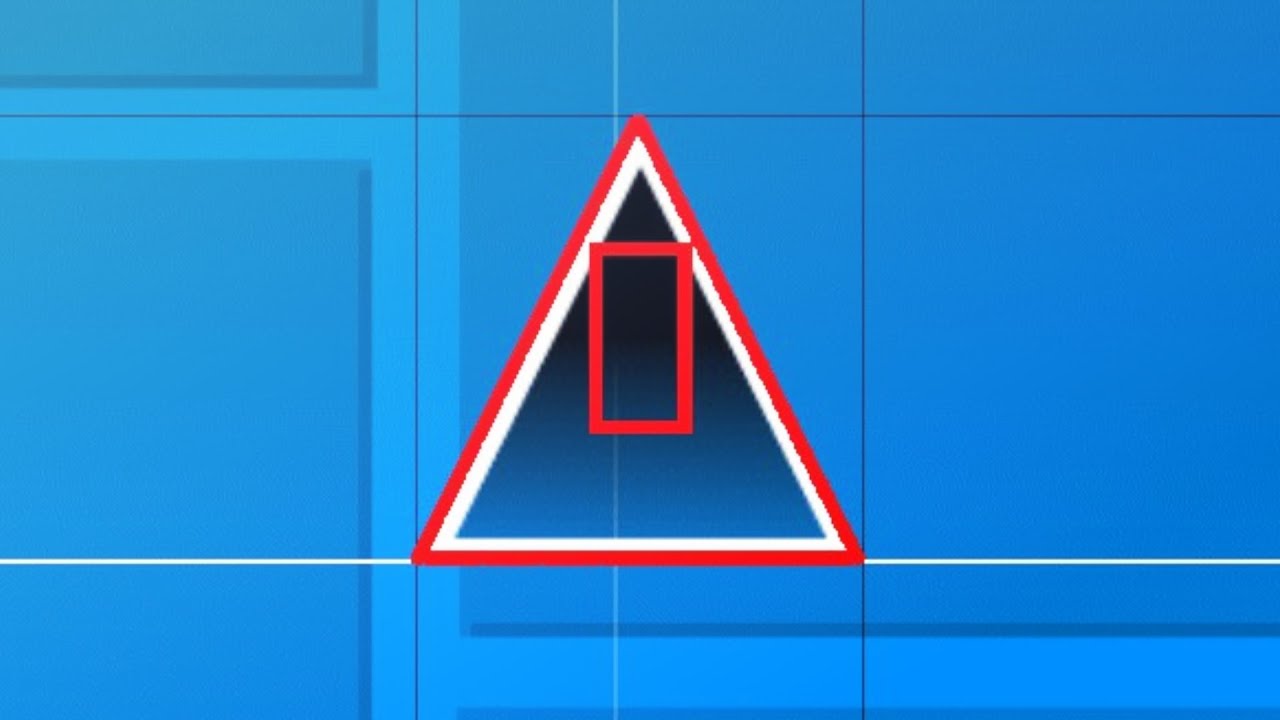
As you can see here, the triangular spike isn’t the actual the hitbox, rather the rectangle inside the spike is the hitbox. It’s a prime and very obvious example of how developers don’t necessarily use accurately shaped hitboxes in order to create collisions for their obstacles.
With this idea in mind, we can take the idea shown in Geometry Dash, and replicate it for our own player. We overlay a small rectangle, just like the image above, within our sprite, and that will be used for collison detection.
Coding
Now that we have an idea of how hitboxes should be implemented, we can start creating a basic outline for how the code will work.
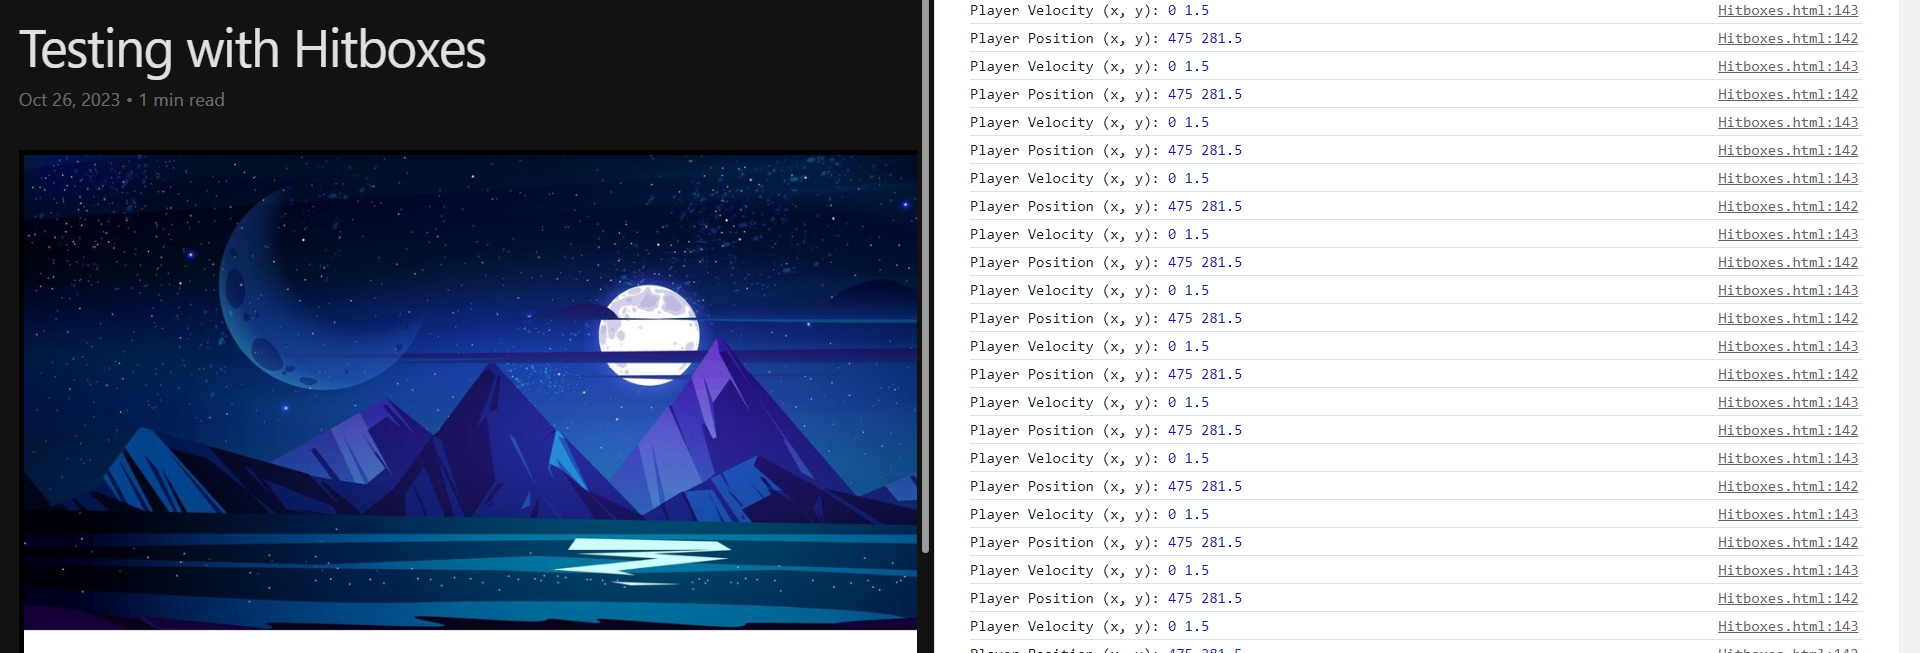
The following is a screenshot of the Testing with Hitboxes tangible. Evidently, the player/square is invisible. This is because we don’t want to see the actual hitbox. However, we’re still able to track the movement of the hitbox by logging its coordinates to the console for each update. This allows us to debug and make sure the hitbox is still moving correctly.
The next steps to actual coding this into the final project would be considering a few things. First, it needs to be decided whether or not hitboxes for the player should be a separtae file or on the same one as the other player code. Additionally, the logic on how to constantly update the square with the player has to be figured out.
export class Hitbox extends CharacterPlayer {
  constructor(characterPlayer) {
    this.x = characterPlayer.x;
    this.y = characterPlayer.y;
  }
}
This will likely be the method used, if successful, for overlaying the hitbox over the player. Other code such as width, height, invisibility, etc. will be added and conjoined through further experimentation.
Future Ideas
Once hitboxes have been added to the player, we’ll have a good sense on how hitboxes can be implemented for other objects, and so hitboxes for obstacles and enemies will be added as well. Once all the hitboxes are in place, then, and only then can collisons be added. How this will be done will be a project for the near future. With some planning, brainstorming, coding, and experimentation, the logic for these things, can be solved. And if not, it won’t be without the merit of a well learnt lesson.